Meta Description: Discover how a garage door opener side mount LiftMaster jackshaft operator boosts efficiency, saves space, and cuts costs with Wilcox Door Service.
In this guide, you’ll learn how the garage door opener side mount LiftMaster jackshaft operator line delivers space savings, cutting-edge myQ technology, and cost-effective installation—plus real-world examples from loading docks and retrofits. Respected Partners, Reliable Service.
Why Facility Managers Choose Side Mount LiftMaster
Core Benefits in One Package
- Space Optimization: Mounts on the torsion bar to reclaim ceiling real estate—ideal for low-clearance warehouses and busy loading bays.
- 30% Faster Installation: Wall-mount setup avoids extensive ceiling work, so facility doors go live sooner.
- myQ Smart Control: Built-in Wi-Fi lets managers monitor and control doors from any smartphone.
- Heavy-Duty Reliability: Direct-drive motor transfers force straight to the torsion bar (no noisy chains).
- Affordable Entry Point: Models start at $650, cutting upfront costs versus traditional ceiling mounts.
Example: A Vancouver distribution center swapped overhead tracks for a LiftMaster 8500W side-mount in under two hours—zero workflow disruption and immediate headroom gains.
Case Study
A high-volume warehouse reported a 40% reduction in installation labor by switching to LiftMaster jackshaft side-mount openers.
Ready to upgrade? Partner with Wilcox Door Service for expert jackshaft garage door opener guidance, professional operator installations and tailored maintenance plans.
Understanding Key Concepts
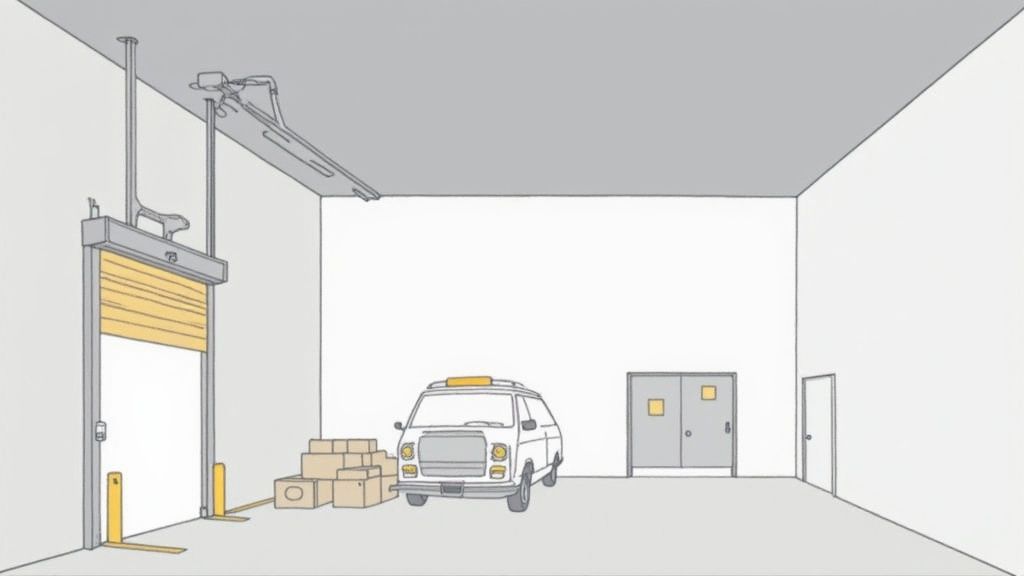
A side-mount (jackshaft) opener clamps beside the door’s torsion bar instead of hanging from the ceiling. Think of it as replacing an overhead train with a wall-mounted tram—headroom is fully reclaimed.
- Direct-Drive Motor: Smooth power delivery directly to the torsion bar.
- Chain-Drive Option: Budget-friendly but slightly more vibration.
- Belt-Drive System: Quieter, with only occasional tension checks.
- Torque Rating: A measurement (inch-pounds) of motor lifting power—higher equals heavier doors.
- myQ Smart Control: Remote monitoring, alerts and scheduling via Wi-Fi.
Torque rating, expressed in inch-pounds, tells you how much weight a motor lifts. In Toronto, a facility retrofit gained 1 foot of clearance by switching to LiftMaster side-mount.
Drive Type Comparison
| Drive Type | Noise Level | Maintenance |
|---|---|---|
| Direct-Drive | Low vibration | Minimal checks |
| Chain-Drive | Higher noise | Regular lubrication |
| Belt-Drive | Whisper quiet | Occasional tension adjust |
With myQ integration, you’ll automate open/close cycles and get instant alerts—like having a dock supervisor on call 24/7.
Key Insight
Side-mount units can free up 100% of overhead clearance in tight facilities.
Real-World Installation Example
- Verify torsion bar capacity and wall support.
- Match drive type to door weight and noise preference.
- Secure the motor to the torsion bar and connect myQ per LiftMaster instructions.
- Calibrate torque settings and align safety sensors.
The result: a slim footprint, hands-off automation and straightforward upkeep.
See the full market report for growth trends.
Comparing Side Mount and Ceiling Mount Openers
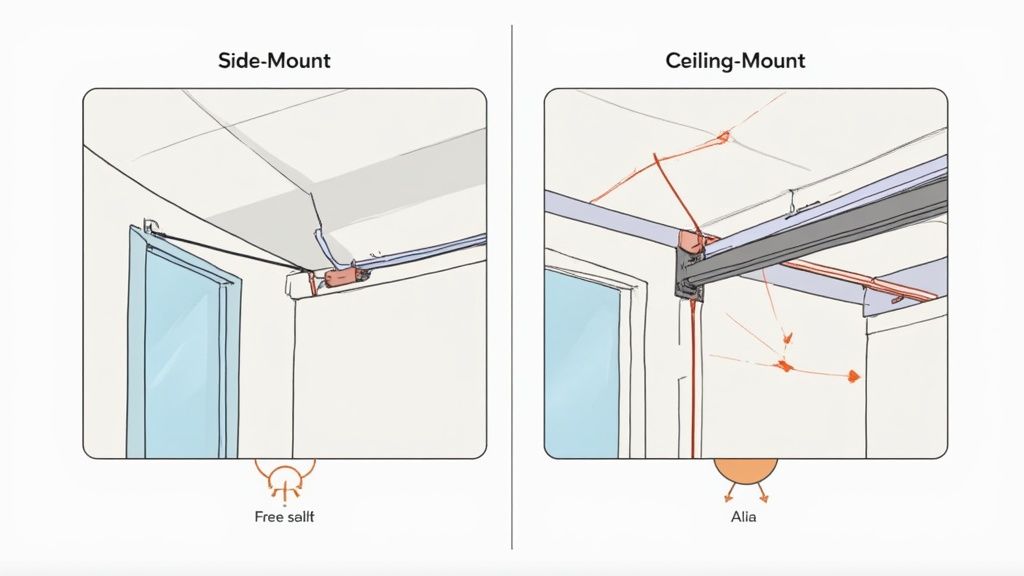
Choosing between side-mount and ceiling-mount means weighing space, serviceability, noise and long-term costs.
Installation Footprint
- Side-mount bolts to the torsion shaft beside the door—no ceiling rails needed.
- Ceiling-mount runs rails across joists, often conflicting with lights and ductwork.
- 30% faster installs with side-mount thanks to wall-level wiring.
Maintenance Access
- Side-mount sits at floor level—no ladders or lifts.
- Ceiling-mount requires elevated access, increasing downtime and labor.
Feature Comparison
| Feature | Side Mount | Ceiling Mount |
|---|---|---|
| Footprint | Minimal wall pocket | Overhead rails |
| Installation Complexity | Streamlined, less labor | Complex beam and rail installation |
| Maintenance Access | Ground-level | Elevated—ladders or lifts required |
| Cost Impact | Lower labor and parts | Higher installation expenses |
Expert Note
Side-mount setups can trim labor time by up to 30%.
Cost & Performance
- Side-mount draws power only while cycling; ceiling-mount often runs cooling fans in standby.
- Over five years, side-mount total cost of ownership can drop by 20% via reduced labor and part replacements.
Example Warehouse Dock
A California center cut energy costs by 15% after switching to a LiftMaster side-mount opener.
Dive deeper with our guide on jackshaft operator installation.
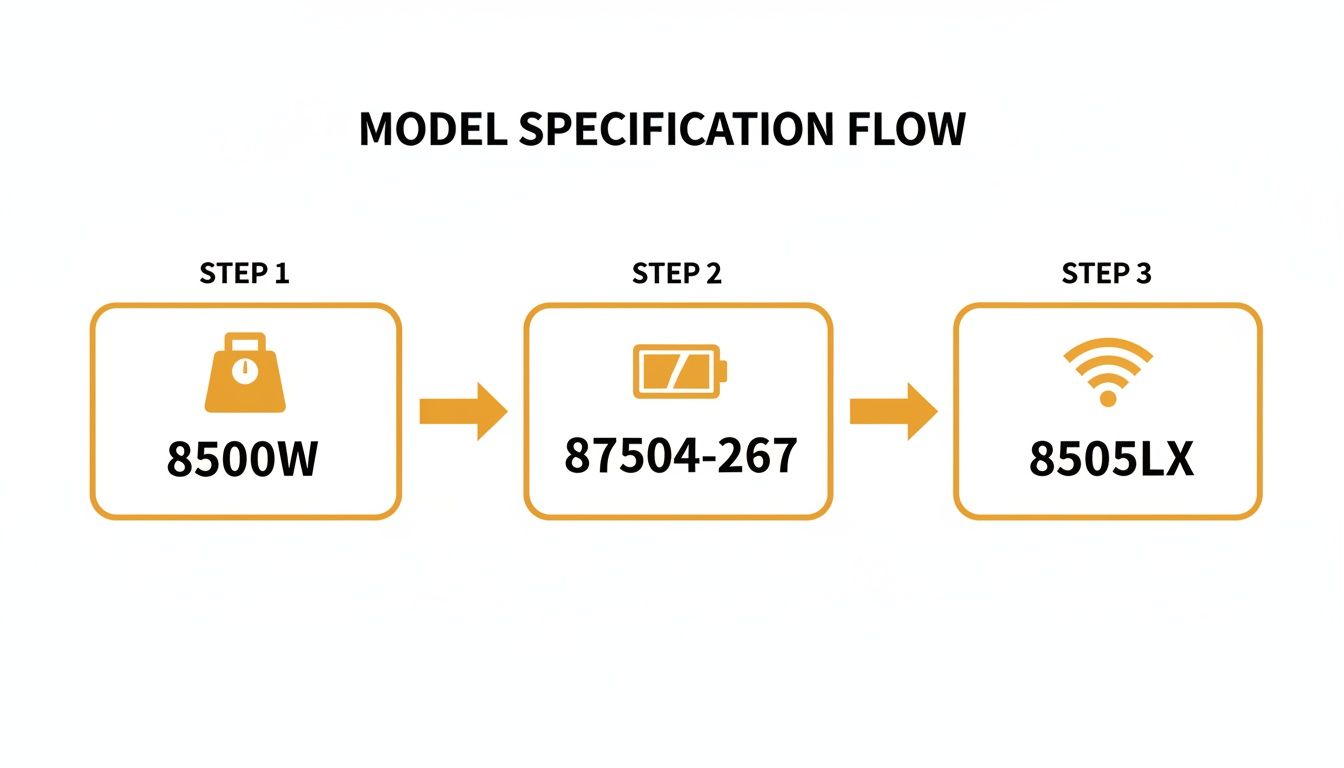
Highlighting LiftMaster Side Mount Models
Models like the 8500W, 87504-267 and 8505LX deliver horsepower, tech and reliability:
- 8500W: ¾ HP direct-drive, onboard battery backup (100 cycles), wireless safety beams.
- 87504-267: 1½ HP, built-in camera, AES-128 encryption, full myQ connectivity.
- 8505LX: 1 HP, 200-cycle battery, one-touch close, myQ Facility network integration.
| Model | Horsepower | Battery Backup | IoT Security | myQ Integration |
|---|---|---|---|---|
| 8500W | ¾ HP | Yes (100 cycles) | TLS | Yes |
| 87504-267 | 1½ HP | Yes (150 cycles) | AES-128 | Yes |
| 8505LX | 1 HP | Yes (200 cycles) | TLS + AES | myQ Facility |
Battery backup keeps doors moving during outages; one-touch close speeds up shift changes, and safety beams plus myQ alerts prevent accidents.
Expert Insight
87504-267 users report 30% faster cycle times during peak hours.
An Edmonton center freed 20 cm of headroom by swapping to the 8500W—improving forklift clearance and ceiling access.
- Follow our Jackshaft Operator Install Guide
- Secure uptime with planned maintenance services
- Master basics in our Garage Door Opener Jackshaft Guide
Contact Wilcox Door Service for a quote or to book your installation.
Planning Installation and Retrofit Projects
Successful projects start with a detailed site survey and coordination with structural engineers to avoid on-site surprises.
Site Assessment Essentials
- Wall framing/backing for plate support
- Torsion spring specs vs. door weight
- Conduit paths to meet electrical codes
- Seismic struts per California CBC
- Headroom, side clearance and workspace
Electrical & Code Compliance
- Neat UL-listed conduit runs
- Junction boxes at service height
- Clear labeling for quick troubleshooting
See our operator installation guide for step-by-step wiring tips.
Mounting Plate & Reinforcement
- Clear old inserts and prep surface.
- Install backing plate (min. 6 mm thick).
- Use commercial-grade anchor bolts torqued to spec.
- Rotate torsion bar by hand to confirm smooth travel.
Pre-Installation Checklist
| Item | Importance |
|---|---|
| Door Weight | Determines torque bar rating |
| Wall Material | Guides anchor selection |
| Electrical Circuits | Ensures proper voltage/amperage |
Structural checks in Surrey cut anchoring errors by 60%—keeping retrofits on schedule.
Maintenance Safety and Troubleshooting Practices
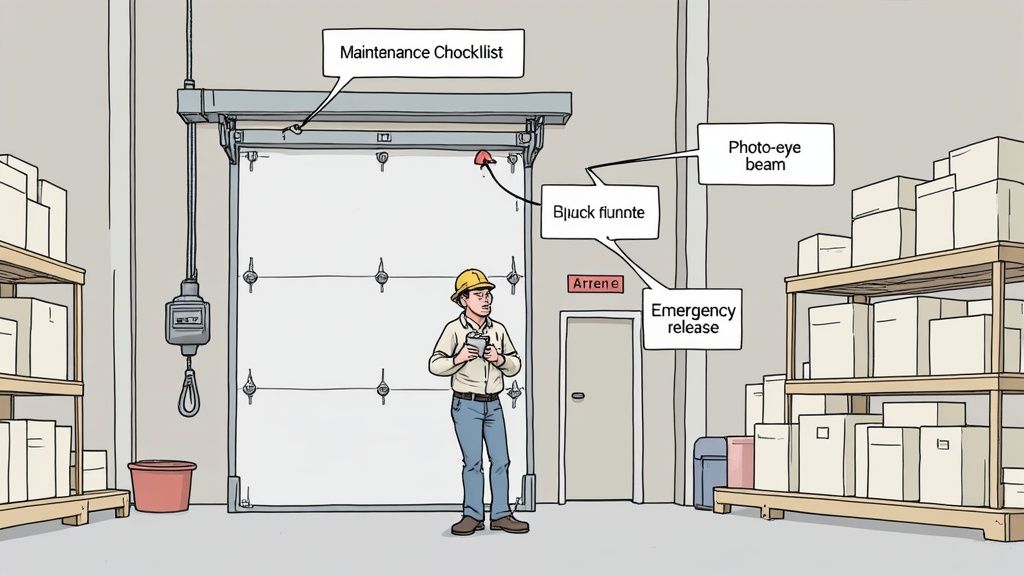
Regular maintenance combines mechanical tune-ups with safety audits—avoiding minor issues becoming major shutdowns. See our garage door maintenance guide on wilcoxdoor.com.
Lubrication & Tension Checks
- Monthly coat of high-grade synthetic oil on gears and bearings.
- Quarterly belt/chain tension set to 20 mm slack.
- Annual replacement of worn rollers and sprockets.
Expert Insight
Proper lubrication reduces breakdown calls by up to 30% annually.
Safety Sensor Alignment
| Component | Setting | Frequency |
|---|---|---|
| Photo-Eyes | Within 1 cm | Monthly |
| Chain Tension | 20 mm slack | Quarterly |
| Safety Edge Test | Activate at 2 cm | Semiannual |
Emergency Release & Seismic Compliance
- Pull-cord heights at 1.2–2 m.
- Manual disengagement tests under full load.
- Inspect seismic anchors for corrosion.
- Log all tests for audit purposes.
Case Study
Proper seismic bracing let an Edmonton warehouse ride out a 4.2 m tremor without damage.
Troubleshooting Common Issues
- Tighten wall and motor brackets.
- Check and recalibrate torque settings.
- Clear and align tracks/rollers.
- Verify myQ LED patterns and Wi-Fi signal.
Routing the myQ antenna at floor level cut repair calls by 60% in Surrey.
Proactive Service Visits
- Winter: cold-weather tests and battery checks
- Spring: pollen removal from sensors
- Summer: heat stress on cables and seals
- Fall: full backup-power trials
Annual plan sites see 50% fewer emergency repairs.
Frequently Asked Questions
Choosing the Right Horsepower
Match motor strength to door weight, size and cycle frequency. High-traffic loading doors often need 1½ HP for reliable performance. See our jackshaft garage door openers guide for details.
Integrating MyQ with Facility Security
MyQ ties garage door controls into your security dashboard. Validate credentials, assign user roles and test alerts to ensure real-time monitoring.
Retrofitting Existing Torsion Bars
- Inspect torsion bars for wear.
- Mount the plate per manual specs.
- Secure the jackshaft operator and calibrate torque.
- Align sensors and test the emergency release.
Step-by-step instructions available in our operator installation guide.
Scheduling Professional Maintenance
Our plans include quarterly lubrication, sensor audits, battery testing and on-demand troubleshooting. Explore our maintenance services to keep doors moving without surprises.
Respected Partners, Reliable Service.
Ready to secure uptime and performance? Contact Wilcox Door Service Inc. for a quote or service inspection at Wilcox Door Service Inc.