This guide will show you why the garage door seal side is crucial for your facility’s efficiency and how to choose, install, and maintain the right one. You will learn about different seal materials, their impact on energy costs, and how they integrate with loading dock systems to protect your assets and improve your bottom line.
That small strip running along the side of your commercial garage door—the garage door seal side—does a lot more heavy lifting than you’d think. As your first line of defense against pests, weather, and energy loss, it’s the critical barrier separating your controlled indoor environment from the outside world. For facility managers, understanding its role is key to maintaining an efficient and secure building.
At Wilcox Door Service, we believe in being respected partners who provide reliable service, and that starts with empowering you with knowledge.
The Unsung Hero of Your Facility’s Efficiency
For a facility manager, where uptime and operational integrity are everything, that simple weatherstripping is a key component of your building’s health. Think of it less as a simple draft blocker and more as a direct influence on your bottom line. A failing seal hits your budget in ways that aren’t always obvious at first, but they add up fast. A worn-out seal isn’t just an inconvenience; it’s a direct threat to your operational efficiency.
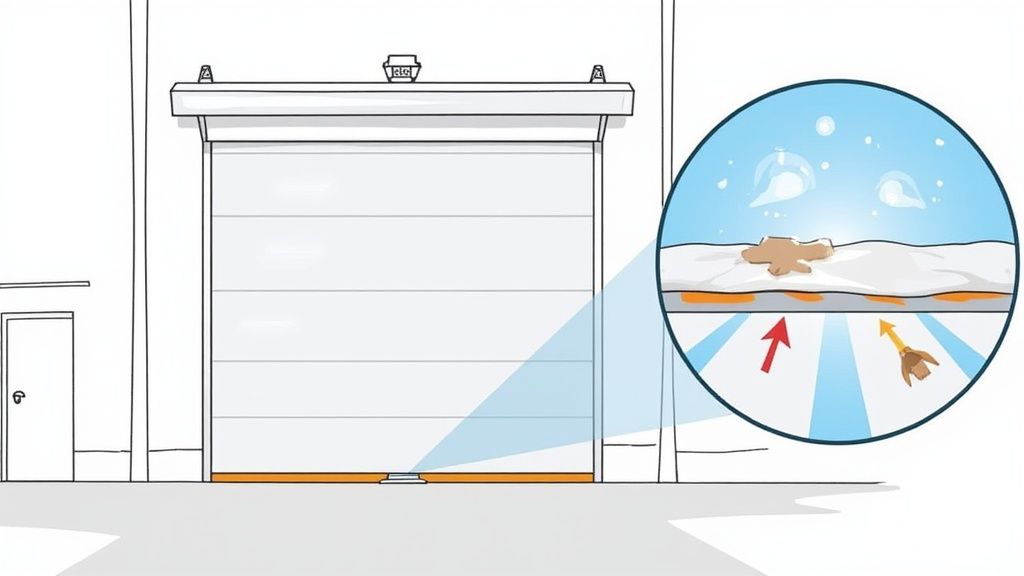
Alt text: Diagram of a garage door seal side and bottom weather seal protecting a facility from wind and snow.
Beyond Just a Draft Blocker
When a side seal gets worn out or damaged, it’s more than just an annoyance. It becomes a financial drain and a real operational risk. Neglecting this one small part can set off a chain reaction of problems across your entire facility.
Here’s what we see in the field all the time:
- Skyrocketing HVAC Costs: Those little gaps around the door frame let your expensive conditioned air pour outside while letting extreme temperatures sneak in. This puts a huge strain on your heating and cooling systems, especially in big warehouses or temperature-sensitive spaces. The result? Noticeably higher energy bills.
- Pest and Debris Infiltration: If you’re in the food and beverage or pharmaceutical industry, a perfect seal isn’t a luxury—it’s non-negotiable. Even tiny gaps are wide-open invitations for rodents, insects, dust, and other contaminants that can compromise your sanitation standards and ruin valuable inventory.
- Unhappy, Unproductive Employees: Nobody wants to work in a drafty loading dock. When staff are stuck near poorly sealed doors, they’re dealing with cold blasts in the winter and sweltering heat in the summer. That can take a real toll on employee comfort, morale, and productivity.
The Loading Dock Connection
This whole idea of sealing gaps gets amplified when you look at the loading dock. A truck backed up to a bay without a proper seal is like having a massive hole in your wall, hemorrhaging energy.
That’s where specialized loading dock seals and shelters become essential. A compression dock seal, for instance, uses foam pads that the trailer literally presses against, creating an incredibly tight, insulated connection. A dock shelter works a bit differently, creating a canopy around the top and sides of the trailer to block the elements while accommodating a wider variety of truck sizes.
Real-World Example: In a large distribution center, poorly sealed docks can cause significant temperature fluctuations, forcing HVAC systems to work overtime. By installing effective dock seals and shelters, facilities can create a complete environmental barrier, slashing energy usage during loading and unloading by up to 90%. This is a direct and measurable improvement in operational efficiency and employee comfort.
Ultimately, whether we’re talking about a simple garage door side seal or a complete dock shelter system, the goal is exactly the same: control your environment, protect your assets, and get the best possible performance out of your facility.
Ready to ensure your facility is sealed for peak efficiency? Contact Wilcox Door Service today for a professional inspection and quote.
Choosing the Right Seal Material for Your Operations
Picking the right garage door seal side isn’t a one-size-fits-all task. It’s a strategic decision that directly affects your facility’s efficiency and bottom line. The perfect seal for a dry storage unit would likely fail miserably in a cold storage warehouse. Making the right call means matching the seal’s properties to your specific operational needs, local climate, and daily traffic.
Let’s move beyond the generic advice and dig into the details that truly matter. We’ll look at the core materials and figure out exactly where each one shines.
Common Seal Materials and Their Best Uses
Most side seals are made from PVC (polyvinyl chloride), EPDM rubber, or brush filaments. Each one has a distinct set of characteristics that makes it a perfect fit for certain environments.
- PVC (Vinyl) Seals: This is your go-to, cost-effective workhorse. PVC is durable, stands up well to abrasion, and creates a solid barrier against drafts and debris. It’s a great all-around choice for facilities with moderate traffic and relatively stable climate conditions.
- EPDM Rubber Seals: When you’re up against serious weather, EPDM is the clear winner. It stays flexible in extreme cold and resists breaking down from UV rays and ozone, which prevents the cracking and brittleness you see in lesser materials. If your facility is in a region with harsh winters and blazing hot summers, you’ll get a much longer service life out of EPDM.
- Brush Seals: Made of dense polypropylene bristles, these seals are uniquely good at conforming to uneven surfaces. They are fantastic for blocking out fine dust, light, and pests without adding the friction that can sometimes slow down a door’s movement. For food-grade facilities or any environment where air quality is a top priority, brush seals are the best choice.
Understanding Seal Profiles: Blade vs. Bulb
Beyond the material, the shape—or profile—of the seal plays a huge part in how well it works. The two most common profiles you’ll see are blade and bulb seals.
- A blade seal is a simple technical term for a seal with a flat, flexible flap that presses against the door to create a tight barrier. It’s simple, effective, and works perfectly for sealing against smooth, even surfaces.
- A bulb seal, on the other hand, has a rounded, hollow shape. This design lets it compress and conform to uneven surfaces much more effectively, filling larger or more inconsistent gaps. If your door or frame has minor imperfections, a bulb seal will almost always give you a more complete and reliable closure.
Expert Insight: For high-traffic loading docks where doors are constantly getting bumped by forklifts, we often recommend a tough EPDM bulb seal set in a heavy-duty aluminum retainer. The retainer protects the seal from direct hits, while the bulb’s compressibility absorbs minor impacts without compromising the seal.
Choosing the right combination of material and retainer isn’t just guesswork; it’s a data-driven decision. For instance, proper perimeter sealing can slash water intrusion during heavy rains by nearly 90% and practically eliminate rodent entry. It’s a small detail with a measurable impact on your operations.
To help you visualize the best options for your facility, here’s a quick comparison of the most common materials.
Commercial Garage Door Side Seal Comparison
| Material Type | Key Benefits | Best For | Typical Lifespan |
|---|---|---|---|
| PVC (Vinyl) | Cost-effective, good abrasion resistance, widely available. | General-purpose use in moderate climates with standard traffic. | 3–5 years |
| EPDM Rubber | Superior flexibility in extreme temperatures, excellent UV and weather resistance. | Cold storage, facilities in harsh climates, high-traffic docks. | 7–10+ years |
| Brush Seal | Conforms to irregular surfaces, excellent for pest and dust control, low friction. | Food processing, pharmaceutical facilities, clean rooms. | 5–8 years |
This table should make it easier to see how each material stacks up against the demands of different commercial environments.
By carefully considering these factors, you’re not just replacing a worn-out part—you’re making a strategic upgrade to boost your facility’s efficiency and resilience. For a deeper look into this topic, check out our guide on the different types of exterior door weatherstripping.
Choosing the correct garage door side seal is a foundational step in maintaining your facility. If you’re unsure which option best suits your needs, our team is here to help.
Your Guide to Side Seal Installation and Replacement
We always recommend having a professional handle the installation for a perfect fit and long-term performance. Still, as a facility manager, understanding the replacement process is incredibly valuable. Knowing the procedure helps you oversee the job, ask the right questions, and see the difference between a quick patch and a reliable, lasting solution. After all, a properly installed garage door seal side is crucial for your facility’s environmental control.
This guide will walk you through the key stages of replacing a side seal, drawing on our decades of hands-on experience. We’ll cover everything from the initial look-over to the final checks, pointing out the small but critical steps that make all the difference in a seal’s effectiveness and lifespan.
Preparing for a Flawless Replacement
Before any tools come out, a thorough assessment is a must. A real pro doesn’t just rip the old seal off; they hunt for underlying issues. This initial check involves looking at the existing seal for tell-tale signs of wear like cracking, brittleness, or “compression set”—a technical term for when the material gets flattened and loses its ability to spring back into shape.
The technician will also inspect the retainer, which is the metal or PVC channel holding the seal. Is it bent, corroded, or pulling away from the door jamb? A damaged retainer means even the best new seal won’t sit right, leading to immediate gaps and early failure.
Finally, they examine the door jamb itself. The surface has to be clean, dry, and free of old caulk, rust, or gunk. A clean mounting surface is non-negotiable if you want the new retainer and seal to form a perfect, airtight barrier. Skipping this is one of the most common DIY mistakes we see in the field.
Expert Tip: When checking the old seal, look closely at the corners where the side and top seals meet. This is a classic failure point. A professional will cut and fit the new seals to create a tight, overlapping connection, completely closing off those corner gaps that drafts and pests love.
Getting the Measurements and Seal Just Right
Accurate measurements are the bedrock of a good installation. It’s not just about the height of the door opening. A technician will measure the exact length needed for the retainer and then figure out the cut length for the seal itself.
Here’s a little insider trick: we often cut the flexible seal insert just a tiny bit longer than the retainer—maybe only a centimetre or two. This extra length allows the seal to be slightly compressed during installation. This ensures it pushes firmly against the top seal and the floor, creating truly gap-free corners without buckling.
Picking the right seal is about more than just length. It means confirming the material and profile are correct for the job, as we’ve discussed. This simple flowchart gives you a visual of the core decision-making process.

Alt text: Infographic showing a 3-step process for selecting the right garage door seal side: Assess needs, Select material, and Choose profile.
Following this process ensures the seal you choose will deliver top performance and longevity for your specific facility.
The Installation Process, Step by Step
With all the prep work done and the right materials in hand, the real work begins. Here’s a look at how a professional gets the job done:
- Removing the Old Seal and Retainer: The old components are taken off carefully to avoid damaging the door jamb. Prying off old retainers can splinter wood or scratch up metal frames if you aren’t careful. All the old fasteners come out, and any holes are filled if needed.
- Prepping the Surface: As we mentioned, the jamb surface gets a thorough cleaning. If there’s any rust on a steel frame, it’s treated right then and there to stop it from spreading under the new retainer.
- Installing the New Retainer: The new retainer is cut to size and lined up on the jamb. A pro makes sure it’s perfectly plumb and straight before fastening it. They’ll use high-quality, corrosion-resistant fasteners suited for the jamb material (like stainless steel screws for a metal frame). The fastener spacing is key—usually every 12-16 inches—to keep the retainer from bowing over time.
- Fitting the New Seal: This is where technique shines. To slide a new vinyl or rubber seal into the retainer’s channel without stretching or tearing it, a technician will often spray a silicone-based lubricant into the channel. This simple trick lets the seal glide smoothly into place. The seal is then trimmed at the top and bottom for a perfect fit.
- Final Tweaks and Testing: Once it’s all in, the door is run up and down several times. The technician watches and listens, making sure the seal makes light, consistent contact with the door face without causing drag. A perfectly installed seal creates a barrier without straining the door opener. As a final quality check, they might slide a thin piece of paper along the edge to test for a consistent seal.
This meticulous, detail-oriented approach is why professional installation delivers superior results. For facilities with large dock systems, understanding the finer points of professional dock seal replacement is just as vital for maintaining a fully sealed, efficient building.
When your facility needs a perfect, long-lasting solution, trust the experts who know every detail of the process.
How Seals Impact Loading Docks and Energy Usage
A single garage door seal side is a crucial part of your facility’s defence against the elements, but the real gains in efficiency come from seeing the entire loading dock as a complete system. Your overhead door is just one piece of a much larger environmental puzzle.
Every time a trailer backs up to your building, you’re creating a massive opening. If it’s left unsealed, you’re practically hemorrhaging energy and inviting the outside in. This is where we need to zoom out and look at specialized loading dock seals and shelters, which bridge the gap between your building and the trailer. They create a robust seal that protects your facility during the critical loading and unloading process.
The Role of Dock Seals and Shelters
While a garage door side seal does its job when the door is shut, dock seals and shelters get to work when it’s open and in use. They are absolutely essential for maintaining climate control, improving safety, and making a serious dent in your energy consumption.
In most commercial facilities, you’ll run into two main types:
- Compression Dock Seals: These are made of high-density foam pads wrapped in durable, weather-resistant fabric. When a trailer reverses into the dock, it compresses these pads, forming a tight, almost airtight seal around the top and sides of the trailer. They’re incredibly effective for facilities that deal with a consistent fleet of trailers.
- Dock Shelters: These are more of an all-rounder. They consist of a rigid frame with heavy-duty fabric curtains. The trailer simply backs through the shelter, and the curtains rest against its sides and top, creating a protective canopy. This design is perfect for facilities servicing a wide variety of trailer heights and widths.
The Real-World Payoff for Your Facility
The impact of a well-designed dock sealing system goes way beyond just stopping a draft. For facility managers, the benefits translate directly into better operational metrics and a healthier bottom line.
Real-World Example: Take a cold storage facility. We’ve seen them achieve massive savings on refrigeration costs just by upgrading their dock shelters. Every moment that dock is open to warmer, humid air, the cooling systems have to work overtime to hold those sub-zero temperatures. A proper seal minimizes this energy usage, protecting both the budget and the integrity of perishable goods, while keeping employees more comfortable.
By creating a complete environmental barrier, a properly specified dock seal or shelter can reduce energy loss by as much as 90% during loading and unloading. This directly impacts employee comfort by eliminating drafts and maintaining stable temperatures, which is crucial for both productivity and safety.
This principle of sealing gaps is a universal win. Here in Canada, proper side seals are critical for reducing the infiltration of cold air, snow, and moisture—a major concern for any heated facility in the winter. Building codes often emphasize limiting these gaps, as they’re a known pathway for energy loss. Effectively sealing the entire building envelope, including the garage door perimeter, can slash uncontrolled airflow and significantly lower heat loss.
A Holistic Approach to Energy Savings
A truly effective energy efficiency strategy looks at the whole building envelope. A high-quality garage door seal side is foundational, but it’s most powerful when paired with other energy-saving measures. To learn more about this, you can read our guide on enhancing commercial door energy efficiency during seasonal shifts.
While effective seals cut significant energy waste at the loading dock, other areas can also be optimized. For instance, some facilities explore measures like improving energy efficiency through solar panel cleaning to further reduce their operational costs.
Ultimately, when you treat your loading dock doors, seals, and shelters as one integrated system, you shift from making reactive repairs to proactively managing efficiency. This shift doesn’t just save money—it creates a safer, more comfortable, and more productive work environment. As your trusted partners, we believe in providing reliable service that addresses your facility’s complete needs.
Is your loading dock an energy drain? Contact Wilcox Door Service for a comprehensive assessment of your dock seals and shelters.
Maintaining and Troubleshooting Common Side Seal Issues
Even the toughest garage door seal side needs a bit of proactive attention to give you a long, effective service life. A few minutes of routine inspection can be the difference between a minor fix and a major headache involving energy loss or pest problems. This straightforward checklist helps your maintenance team catch trouble early and know exactly when it’s time to call in the pros.
A quick visual inspection every quarter is your best first move. You’re looking for the obvious signs of wear and tear that could compromise the seal’s integrity.

Alt text: Troubleshooting checklist for garage door side seal issues, showing a cracked seal, damaged edge, and detached retainer.
A Simple Maintenance Checklist
Keeping an eye on your seals doesn’t have to be a huge production. Just add these quick checks to your regular facility walkthrough:
- Check for Cracking and Brittleness: Over time, UV rays and big temperature swings can make vinyl and rubber seals hard and brittle. If the material cracks when you give it a little flex, it’s lost its pliability and isn’t sealing properly anymore.
- Look for Gaps and Daylight: Close the door, turn off the lights inside, and look at the perimeter. If you see daylight peeking through, you’ve got a gap that’s letting in air, moisture, and pests. It’s an open invitation.
- Assess Compression Set: A healthy seal should be slightly squished against the door to create that tight barrier. If it looks permanently flattened and doesn’t spring back, it has a “compression set” and is basically useless.
- Inspect for Physical Damage: Pay close attention to the bottom few feet of the side seals. This is the high-traffic zone where forklifts, pallet jacks, and other equipment often make contact. Any tears or gouges are immediate failure points.
Troubleshooting Common Field Issues
When you do spot a problem, a quick diagnosis can point you to the right next step. Here are a few common scenarios we see out in the field and what they usually mean.
Problem: You can see daylight all along the length of the seal.
Likely Cause: The seal has probably shrunk over time, or the retainer holding it has started to pull away from the jamb.
Solution: A simple adjustment of the retainer might just do the trick. If the seal itself has shrunk, a full replacement is the only real way to get that complete barrier back.
Problem: The bottom edge of the seal is torn or looks shredded.
Likely Cause: This is classic impact damage, almost always from equipment traffic getting a little too close.
Solution: That damaged section—and probably the entire strip—needs to be replaced. This prevents the tear from getting worse and ensures a proper fit.
Problem: The seal looks wavy or buckled along the track.
Likely Cause: This is often a sign of an improper installation, where the seal was stretched too tightly. It could also mean the retainer itself is loose or bent out of shape.
Solution: The seal might just need to be taken off and re-installed correctly. If the retainer is damaged, that will have to be replaced first.
Expert Insight: If you feel like you’re constantly replacing the same side seal, it might not be a seal problem at all. Recurring damage can be a symptom of a much bigger issue, like a misaligned door track that’s causing the door to scrape against the seal on every single cycle. In those situations, a professional inspection is crucial to find the root cause and prevent even more significant damage to your entire door system.
Facility managers also need to keep the cost and availability of replacement parts in mind. In Canada, the price for commercial-grade seals can vary quite a bit depending on the material and length you need. While you can find consumer-grade seals easily, a professional replacement using high-quality materials ensures longevity and proper performance—a much wiser investment than frequent DIY fixes. For a general idea of pricing in different markets, you can explore garage door seal costs on Home Depot’s website.
If your troubleshooting uncovers something more complex than a simple worn-out seal, don’t hesitate to call for backup. Wilcox Door Service provides expert inspections and repairs, making sure your doors operate safely and as efficiently as they should.
Your Top Questions About Commercial Garage Door Seals
Over the years, our team fields a lot of questions from facility managers about getting their garage door seal side just right. To wrap things up, here are some of the most common ones we hear, with straightforward answers drawn from our decades of work in the field.
How Often Should We Be Replacing Our Side Seals?
There’s no hard-and-fast rule here, as it really depends on door traffic, your local climate, and the type of seal material you’re using. For a busy commercial facility, though, a good ballpark is a replacement cycle of 5 to 10 years.
Your best bet is to just keep an eye on them. The seals will tell you when they’re done. Look for these tell-tale signs:
- Obvious cracks, splits, or tears in the material.
- The seal feels stiff or brittle to the touch instead of flexible.
- You can see daylight or feel a draft coming through the sides when the door is shut.
Can New Side Seals Genuinely Lower Our Energy Bills?
Yes, absolutely. It’s easy to overlook small gaps, but they add up to a huge amount of airflow. That constant leakage forces your HVAC system to work overtime just to keep your facility at the right temperature, whether you’re heating or cooling.
This is especially true for large warehouses or sensitive, climate-controlled environments like cold storage or pharmaceutical plants.
Sealing up those persistent leaks can make a real difference in your energy consumption, often providing a surprisingly fast return on your investment. A tight building envelope is one of the smartest, most effective ways to get a handle on operating costs.
What’s The Difference Between a Side Seal and a Dock Seal?
This is a really common point of confusion, but they serve two completely different, though equally important, purposes.
- A garage door seal side is attached directly to the door’s perimeter—the side jambs and the header. Its only job is to create a tight barrier when the door is closed, sealing the opening itself from the elements.
- A dock seal or shelter, on the other hand, is a much larger apparatus mounted to the exterior wall around the dock opening. Its purpose is to create a seal between the loading dock and a parked truck trailer while the door is open for loading and unloading. It bridges that gap to create a complete environmental barrier. For a truly efficient facility, you need both.
Your building’s efficiency and security hinge on every single component doing its job. For expert advice and service that you can rely on, trust the team at Wilcox Door Service. We are respected partners providing reliable service for all your facility’s needs.
Contact us today to schedule a professional inspection or get a quote for your sealing needs.